1 week to go...
I am expecting delivery at around 9.00am on Saturday 9th November. So a few last
minute purchases and preparations has resulted in the Toolbox gaining a little
weight and my single garage getting a full make over. One of the first jobs was
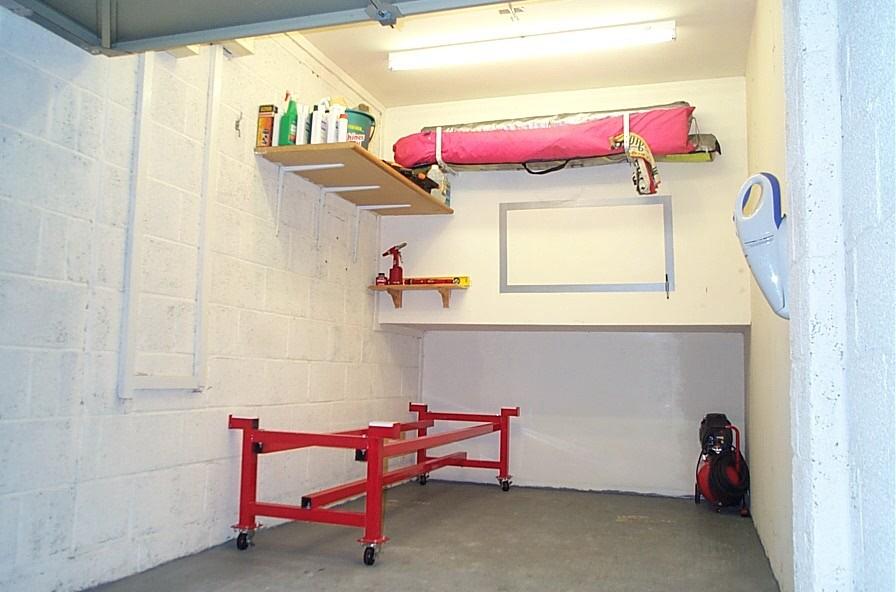
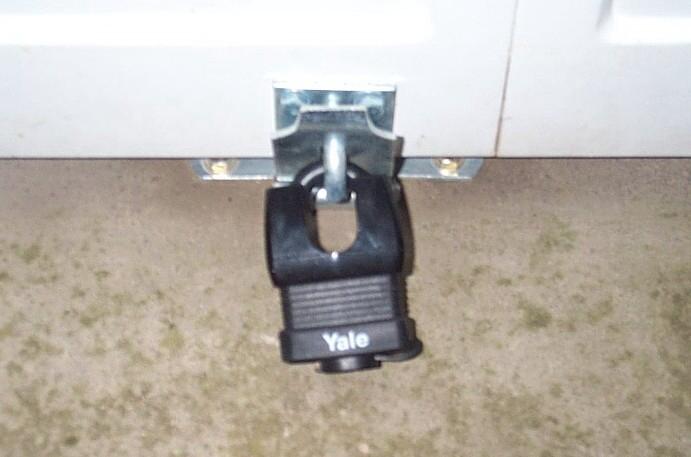
to secure the garage a little better, this was achieved by adding an additional
lock with a rather heavy duty padlock. The other main job of the weekend was to
get some lights in the otherwise dimly lit garage, this was achieved by adding
two fluorescent strip lights and changing the centre light for a 150w example
(this has made a huge difference). Both of these jobs were made far easier by
the help of my mate Geoff, thanks mate and the moral support of my wife when my
electrical skills appeared to be letting me down.
So with the toolbox and garage prepped it would appear that I'm ready... Next
update should be Sunday the 10th when Christmas comes early (hohoho...)
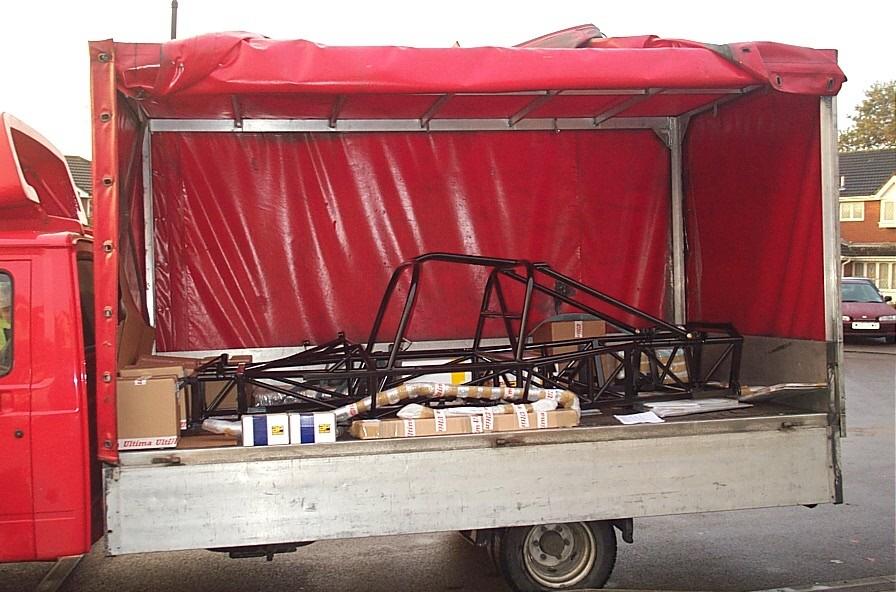
Santa Arrives Early...
So after 12 weeks of sleepless nights the big day comes, early too. The Ultima
delivery van trundled into my close at 7:40am! So bleary eyed I met up with
Santa and a lorry load of gifts. Having purchased all 17 stages of the build
there was quite a lot (obviously no GTR body though).
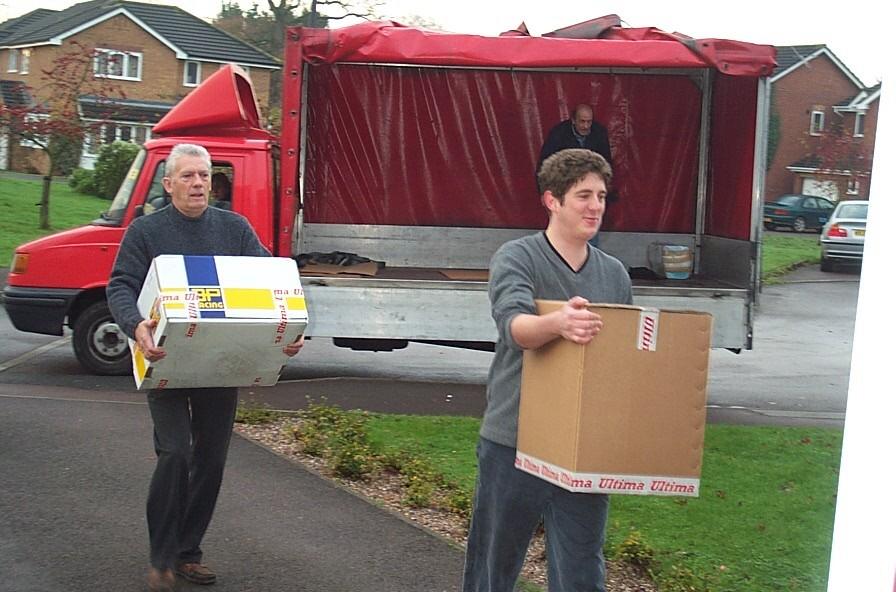
Now the first hurdle was where to store all the boxes. As most of you know I
am starting the build in my single garage! Most of the boxes were stored at the
back of the garage but some were going to have to be stored in the house, of
course my wife Annette fully supported this decision…
I must say at this point that the packaging and presentation of the Ultima parts
is simply outstanding. Everything boxed / packaged to prevent damage and
everything labelled with my name and chassis number down to the last nut and
washer, very impressive. This should make the build a whole lot easier.
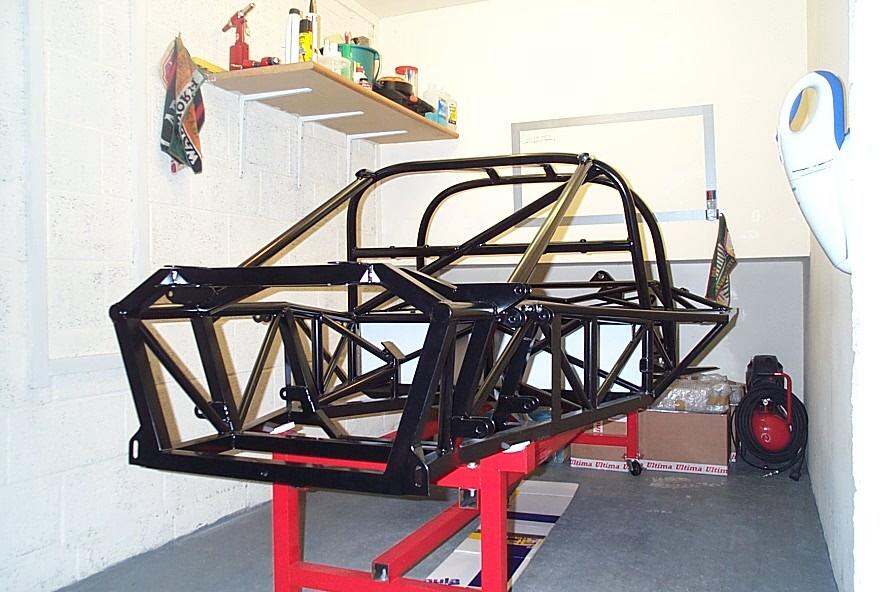
Next was to lift the chassis onto the dolly (it fits, hurrah!) and then wheel it
into the garage. Wow! not much room in there now…
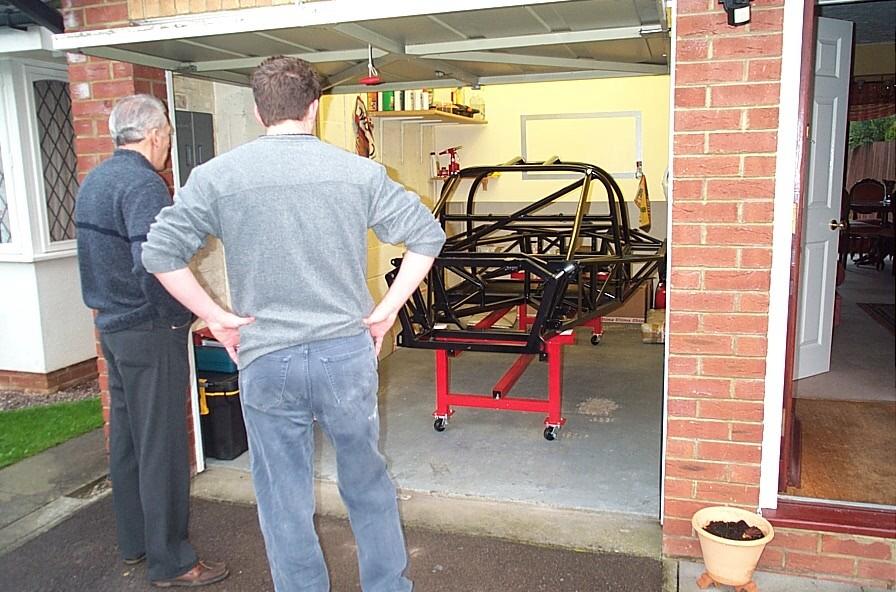
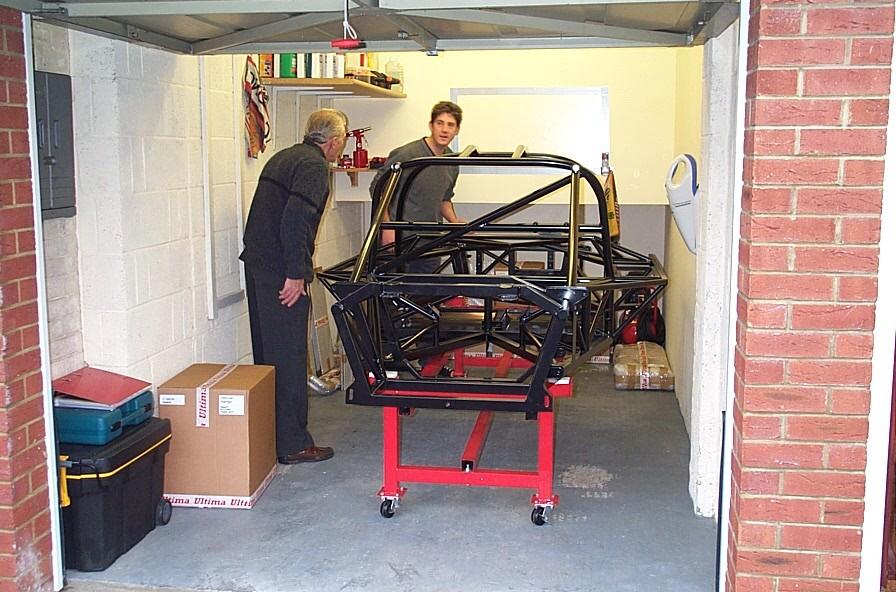
So by around 8:00am my father and I were ready to start. First thoughts are
to open the boxes and take a look at all the parts, but with some thought this
really seemed like a bad idea. However I could not resist a sneak peek at the AP
Racing Brakes, they really do look the business (don't worry you'll get to see
them later...).
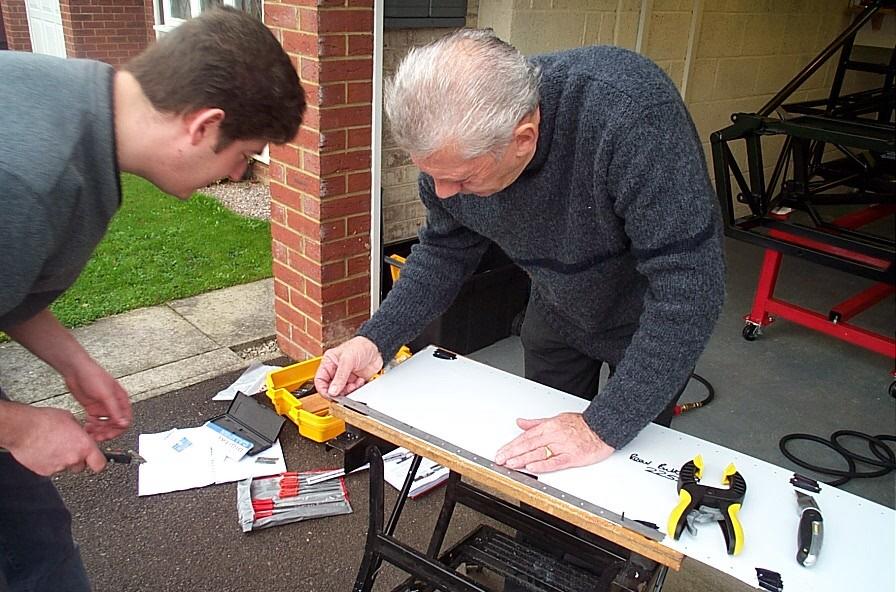
Let’s look at that all important build manual and have a cup of tea (well you've
gotta start as you mean to carry on). So having read the first few pages of the
manual regarding the fitting of the aluminium panels it was time to start.

The first panel to fit is the inner rear bulk head. Having found the correct panel not difficult really when its already labelled, it was time to offer it into position. At first it would appear that the panel fits perfectly apart from the fact that the top of the panel needs to be flush with the top of the chassis rails and flush to the bulkhead rails. This requires a small notch to be cut in the centre of the panel to ensure there is no fouling on the centre chassis rail/weld. This was achieved with the Air Nibbler and a final bit of fettling with a hand file. Be careful with the nibbler it can nibble like a rat on steroids if you’re not careful. I had a bit of practice first on a few scrap panels that Ted had included in my kit for this very purpose.
So with the panel now fitting in place and flush it was time to think about drilling the holes. This was made much easier with the use of Cjs Rivet Jig idea (see www.ultima-gtr.info for more details), thanks mate and thanks to Mark for getting a pair of them made for me. The holes are positioned 10mm up from the bottom chassis rail and approx 19.25mm (half the diameter of the chassis rail) down from the top. With the holes now in the panel it was time to put some holes in the chassis (preferably in the right place!). This is achieved by positioning the panel flush to the top chassis rail and then drilling the 4 corner positions, these are then secured by the skin pins supplied with the Ultima kit. The rest of the holes can then be drilled taking care to move/use the skin pins to avoid the panel chattering. With the holes in the chassis deburred and the panel fixed back onto the chassis the first panel fitting was complete.
Seemed to go fairly well, this is going to be a doddle we thought…
Ohh but no, as the next panel is a bit of a pig to fit. Next up was the fitment
of the side panels. We choose the passenger side first (no real reason!). The
fun begins when you realize that it’s very difficult to offer the panel into
position, this prevents you from seeing the position of the notches that need to
be cut in order for the panel to fit around the chassis rails. Guess work was
not going to be an option here so it was time to create a template and a big one
at that. We made a full size template from cardboard with the bend in the
correct place with the use of some ‘Duck Tape’. This was then much easier to
maneuver into place without taking half the power coat of the chassis. This
template was then made to fit buy notching the cardboard template at the
appropriate points. The template was then used to mark the positions and shapes
of the required notches. The panel was then nibbled away (carefully!) and tidied
up with a hand file. Before we tried to fit the panel in place the chassis was
covered in ‘Duck Tape’ at various points to ensure that the chassis was
protected against scratching.

It fits, great this is a result just a little more fettling with a hand file
and the job was a good one. Now that the panel was fitting within the chassis it
was again time to drill the panel. The position of the 30mm spacing of the holes
needs some consideration here as the panel length is not divisible by 30. We
opted to start the 30mm spacing from the centre bend and work out from there and
this seemed to work well in both directions.
Once the holes had been deburred the panel was again placed in position. At this
point it became apparent that the bottom corner at the front was not fitting
flush to the chassis as for one there was as small weld in the way and also the
panel was really a little bit too tight a fit. Not being happy with this it was
time for a small notch and some further fettling. This process took some hours
before the panel eventually fitted flush to the chassis rails and didn’t feel as
if it was spring loaded (it was worth it though). The panel was then aligned to
the chassis rails, although this meant that the top of the two panels didn’t
align. At first I thought this was a problem but further reading of the manual
indicated that the folded return of the panel need to be cut down by 18mm
anyway. Also I still have to drill the holes in the folded section of the side
panel, after I have cut it down. This is yet to be done…
So after some 18 man hours and numerous cups of tea we basically had two panels
on the car, this I was quite happy with, as we are in no rush.
As far as building goes in a single garage we didn’t find it to be a problem
which was a surprise really. This is mainly true due to the fact that the
chassis is on a dolly and can be moved around.
Get out, your time is up…
At last a result, a court hearing today has ruled that the idiot living in my
sister’s house (without a valid tenancy agreement and without paying for 4
months) has been given a 14 day notice before the bailiffs/police move in.
Double garage here I come...
Next update should be after next weekend, cheers for now.
Progress but slow...
First the bad news, it appears that the good news that the idiot residing in my
sister's house is staying even longer. Apparently there was a
misunderstanding???!!!. So it now appears that this idiot will now remain in my
sister’s house until some time in January! At which point the bailiffs will move
in. Here's hoping...
So the build progresses, Saturday was mainly spent finishing up the odd jobs
still left to do on the rear bulkhead and passenger side panels. First up was to
drill the vertical set of holes in the rear bulkhead. The positioning of the
holes was a little awkward due to the 30mm spacing. So looking at the build
manual I counted the number of holes between the top and bottom of the panel and
positioned the rivet jig so that the distance between the top horizontal rivet
and the first vertical hole was the same distance as the bottom rivet up. This
gave me 7 holes with 30mm spacing with a slightly larger spacing top and bottom
and this appeared to be a good compromise. Looking at the build manual later I
noticed that the centre rivet hole along the bottom of the rear bulkhead panel
is not actually drilled. Having studied the build manual more over the weekend
it appears that quite a lot of info can be gleaned from the pictures (lesson
learnt!). Still I was happy with the result that I had.
The next small job to tackle was to cut the passenger side panel folded return
down by 18mm to allow the panel to be rolled over the chassis bar later. This
was achieved by the use of a junior hacksaw and a few different hand files.
Happy with the result it was now time to drill the holes in the folded return,
these were positioned 10mm up and 30mm spacing to match the bottom last rivet of
the rear bulkhead. The panel was then positioned back in the chassis and aligned
to allow the holes to be drilled through the side panel and through the rear
bulkhead. Be careful with the topmost hole as it is very near the top chassis
rail (you are only drilling the rear bulkhead panel, not the chassis!). With a
little more fettling to ensure good panel fitment it was time to move on to the
next panel, the drivers side panel...
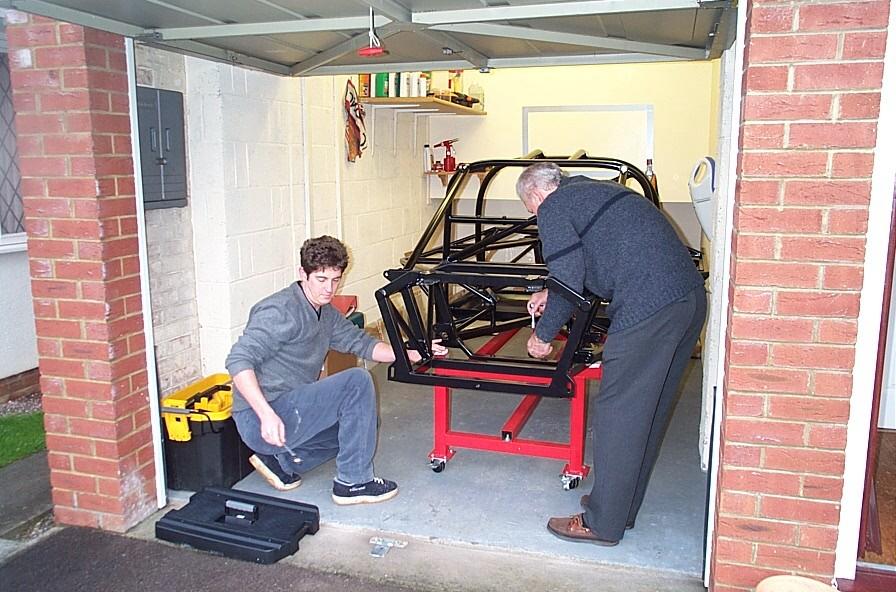
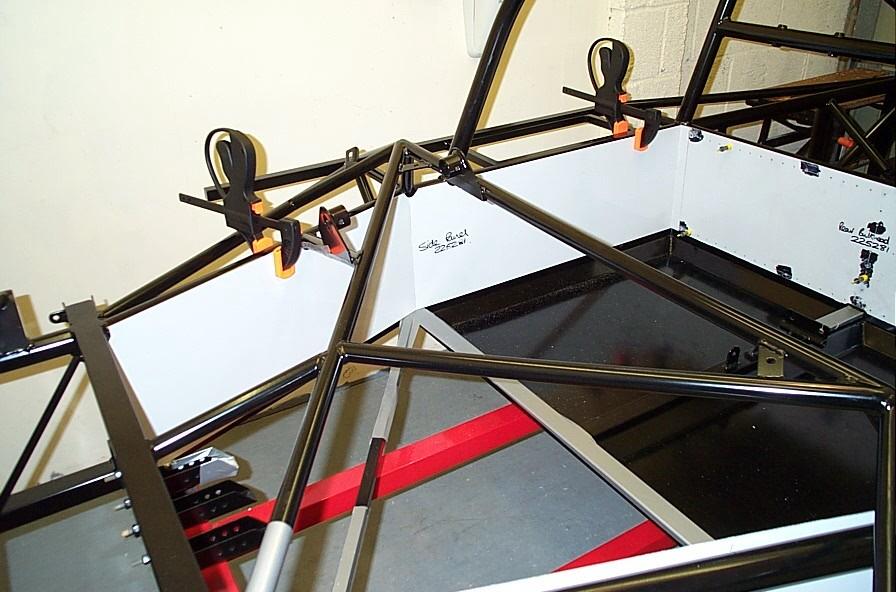
With the help of my father things now began to move a little quicker. So on to the side panel, we used the template from the previous side panel. An additional notch was removed from the template around the steering rack support brace (this is a deep notch too). This was enough to get the template fitting well enough with the old notches being very close to the new. This panel is a bit of an arse to get in and out of position so plenty of 'Duck Tape' was used to protect the chassis. The major problem with the fitment of this panel was around the steering rack support brace so this notch was the first to be removed from the side panel. Once this had been done the aluminium panel was easier to get in and out. The other notches were then removed and after half a dozen or so attempts the panel was a perfect fit (templates rule!). A little further fettling and the panel was ready for drilling. This will have to wait as it was now getting a little late...
So a good weekend of Ultima build but it would appear that not that much was
done. The most important thing was that what was done, was right! On Saturday I
will attempt to finish of the drivers side panel and on Sunday move on to the
front bulkhead (have heard that this one is some fun too!).
Laters...
Just a quick note to say lots done at
the weekend, but I'm of to Jersey on business and will post full report on
Thursday...
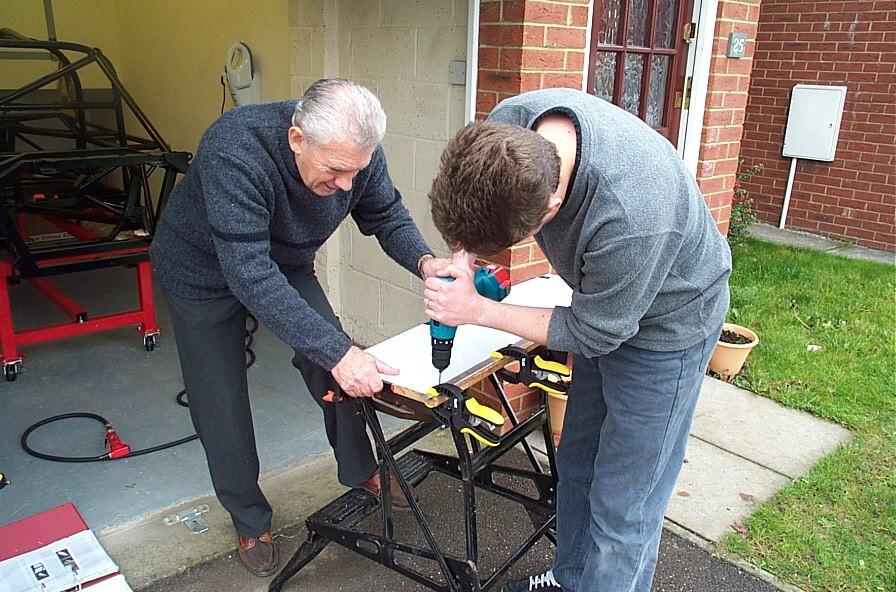
On Saturday I finished up the drivers side panel, this was just a case of drilling all the holes in the panel and then in the chassis. The last few holes position on the drivers side panel cannot be accessed so check first how far down the panel can actually be drilled/riveted. Also the 18mm cut out also need to be made in the panel to allow the bending over the chassis later.
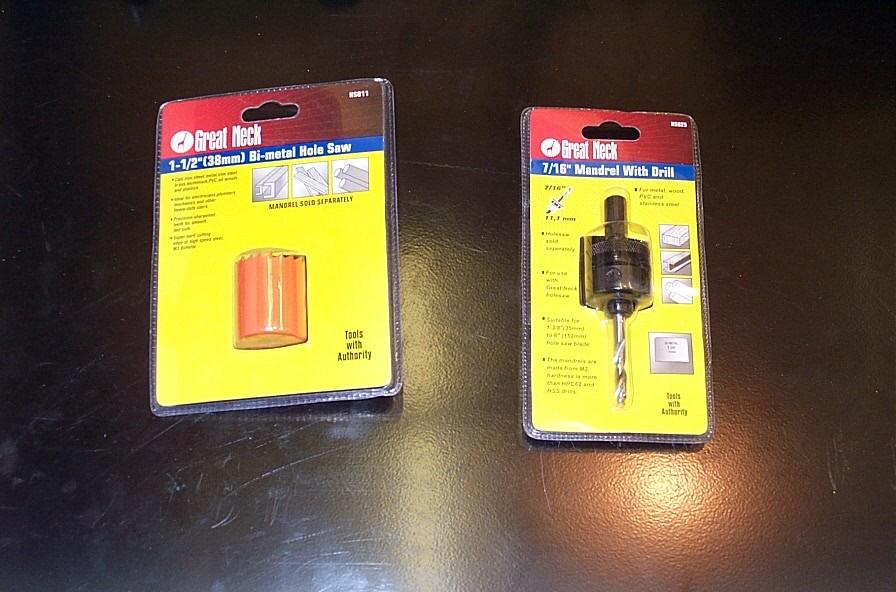
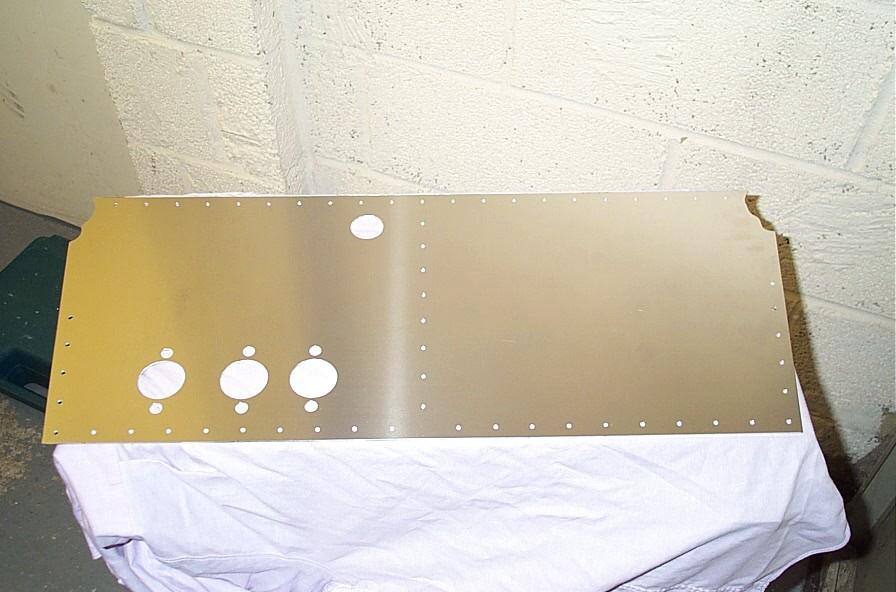
On Sunday my father and I started on the front bulkhead panel. This panel requires 3 x 38mm holes to be cut for the master cylinders. This was to big for the stepped drills as the max size was 30mm, so of in search of a 38mm hole saw/tank cutter (Toolbox updated). After travelling to three different B&Qs in and around Bristol we finally acquired the little devil (last one, believe it or not!)
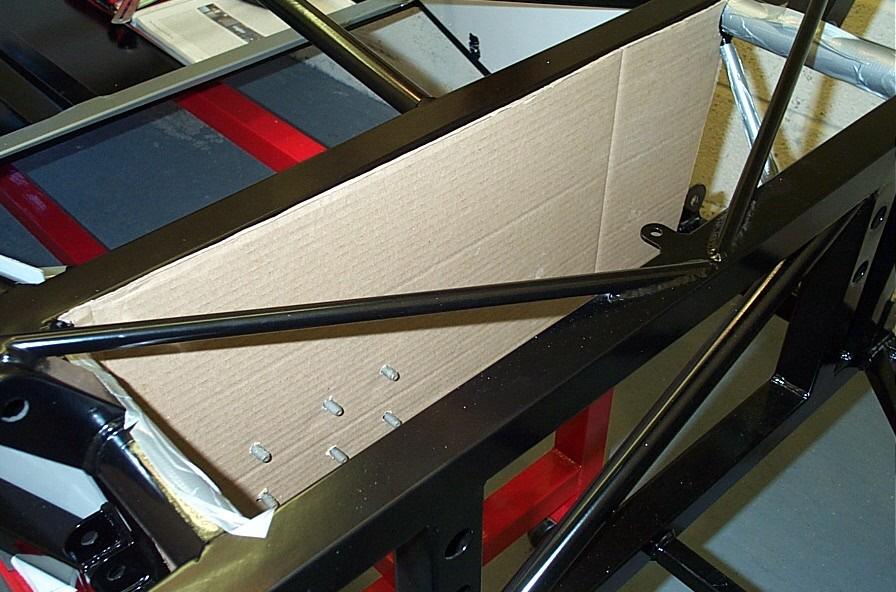
This really is an awkward little sod of a panel as getting the panel into place involves the panel being flexed/bent temporarily. This was going to all end in tears if we were going to repeatedly move the panel in and out, so a template as the order of the day. This also allowed the approximate location of the studs for the master cylinders to be established.
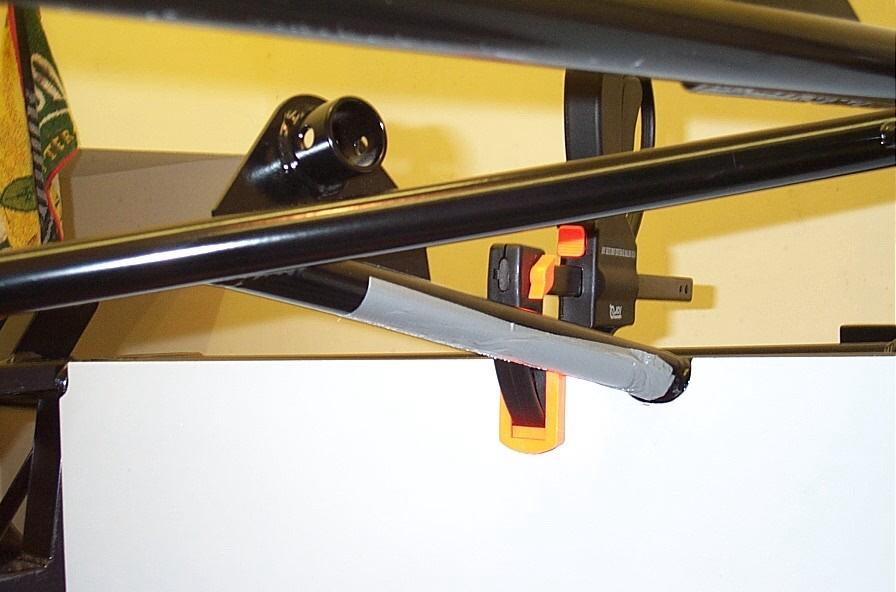
There is quite a bit of metal removal to be done here so the 'Air Nibbler' was once again put to good use, but be careful though. Once we were somewhere near we tried fitting the panel in place, ensuring any of the obstructing chassis rails were protected. After a fair bit of bending and flexing the panel was in place, but it certainly didn't fit. But it was close and this is the best way to be, as removing too much would be a disaster. So a little fettling was the order of the day, this was done with some hand files. With the panel now in place it was time to consider the position of the stud holes. Again the template as used as a guide, the positions then marked on the panel and re-checked with the chassis using a digital vernier. Happy with the positions of the holes we drilled 6 x 100mm (slightly oversize). The panel was positioned back in the chassis and, perfect (phew, what a relief). Just a final bit of fettling and perfection, now lets get these 38mm holes in position. These were easily marked through the existing holes and the centres found, a pilot hole was drilled in each one and it was time for the hole saw. This was not as easy as it should of been as the saw/drill seemed to have a bit of a wobble (a bit of messing with the mandrel and this was sorted) and the hole were drilled without to much of a problem.
The hole for the steering column was next and its position is shown in the manual it size is 28mm - 30mm. This was measured (the measurements are made from the chassis rails so this needs to be done while the panel is in position) and the hole was drilled in position with a stepped drill.
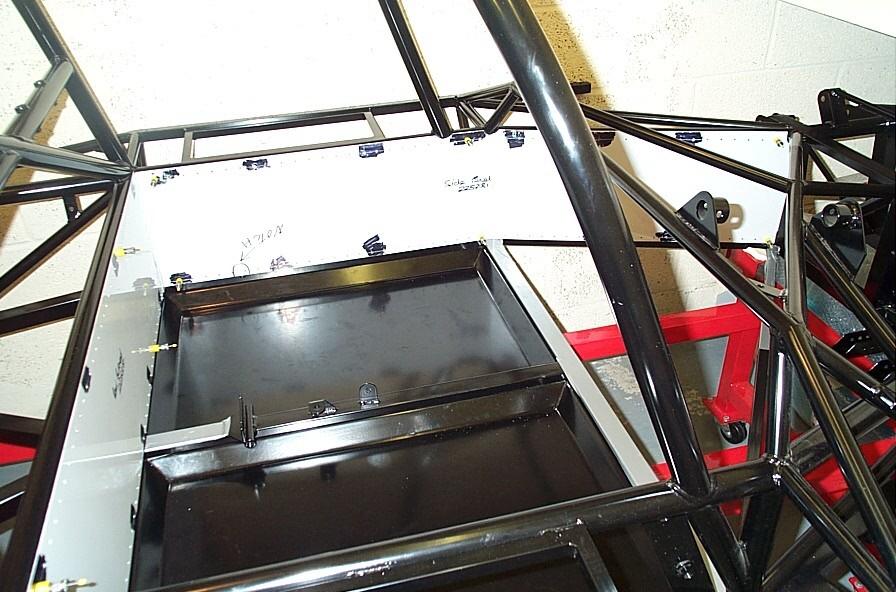
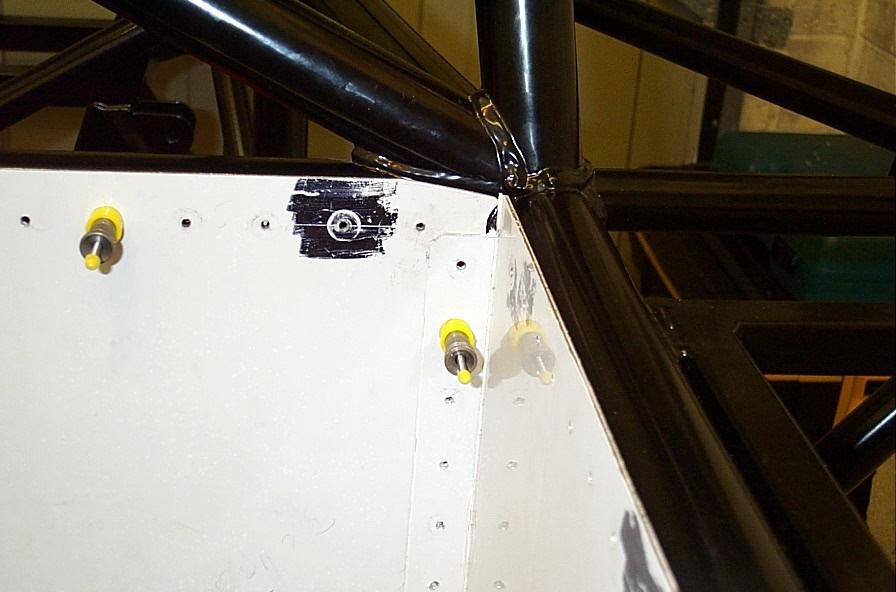
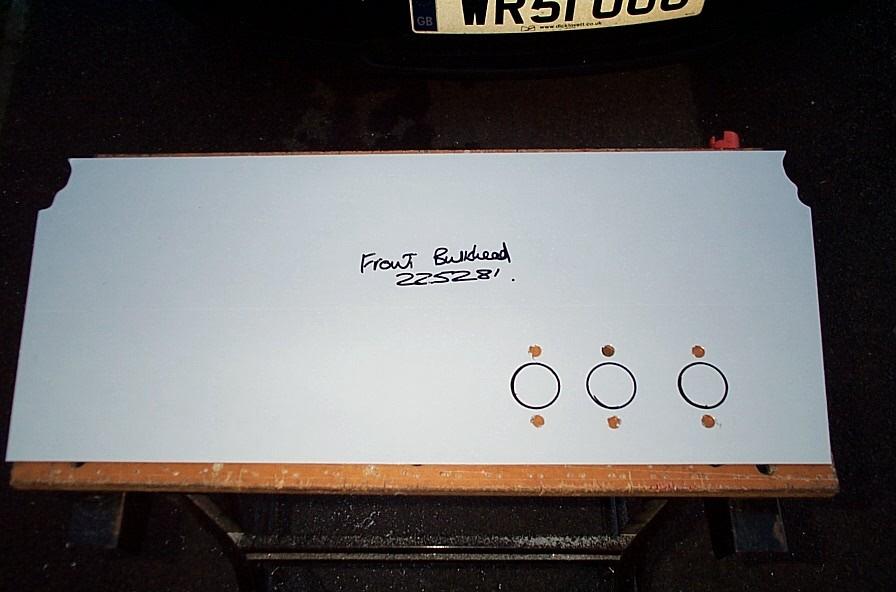
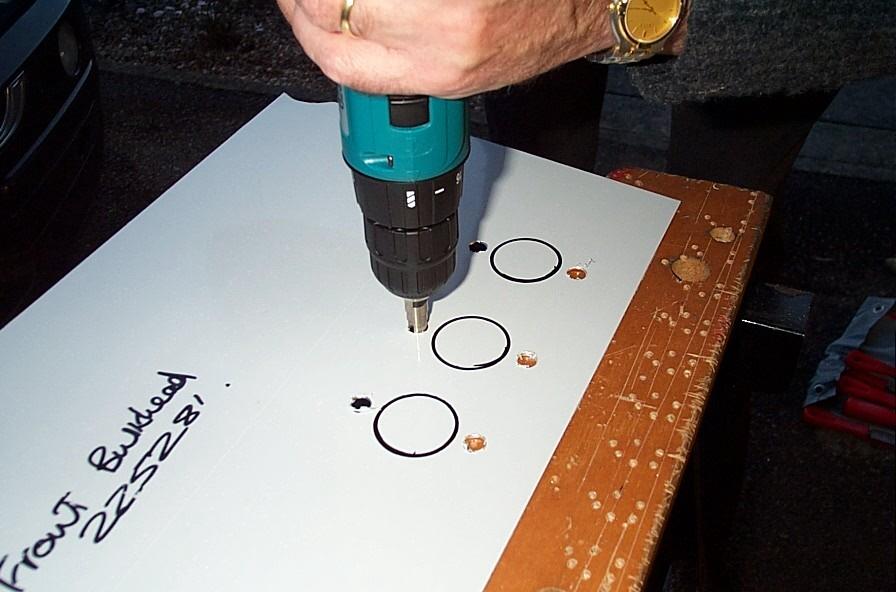
The last job was to mark out the holes on the panel. Again care is need here as 300m hole spacing is not a perfect fit. With some thought 300mm hole spacing can be used though (all holes drilled so far have been the same (30mm), I didn't want to change that now). This resulted in the panel being drilled as seen below (note how the vertical side holes are not drilled to the top due to access problems):
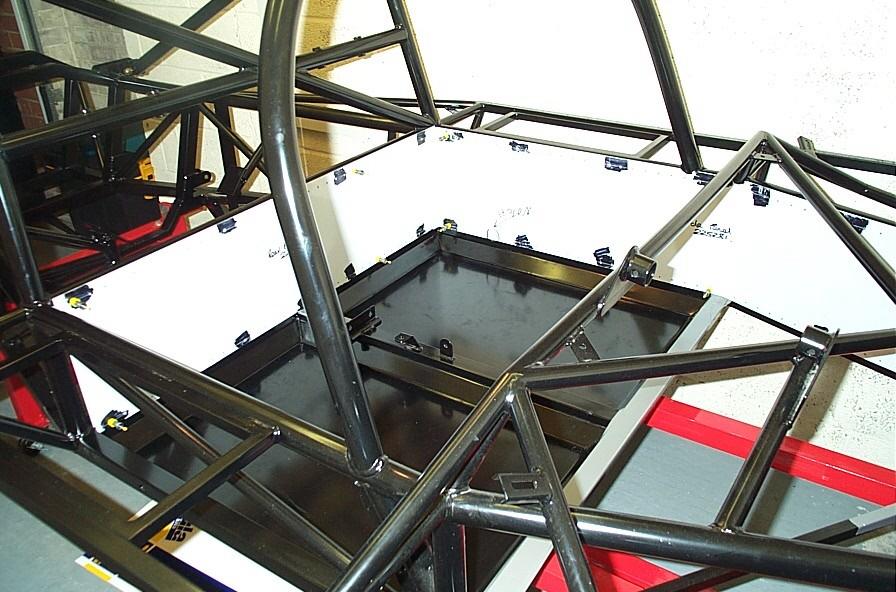
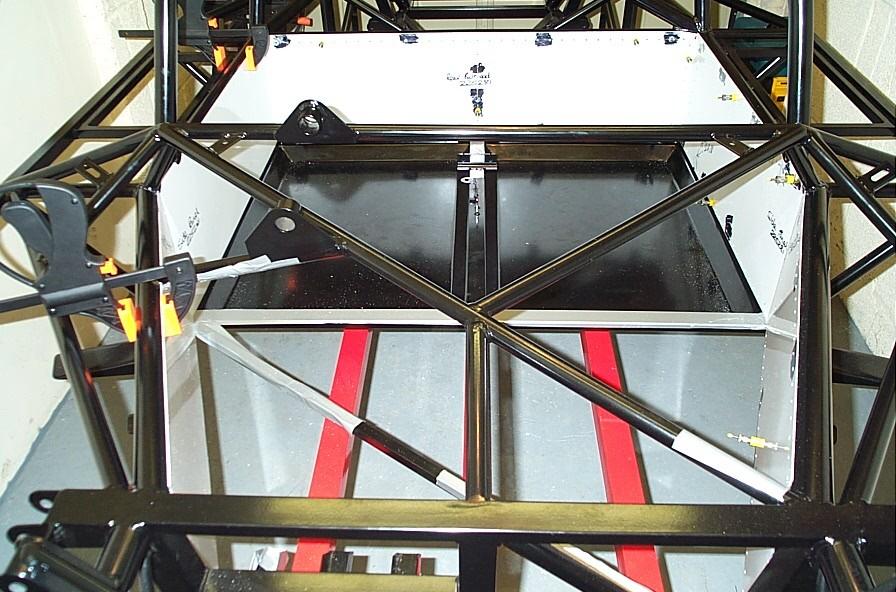
Now it was time to fit and rivet the panel to the chassis. Both the panel and chassis were degreased and a bead of sealant was applied to the chassis at all the points were the panel touched. With both the air riveter and hand riveter at the ready the panel was positioned in place for the last time. This was then riveted to the chassis, and what a messy job this can be. Make sure you have plenty of rags and WD-40 (cleans sealant real good) at the ready. Once cleaned up though you end up with this:
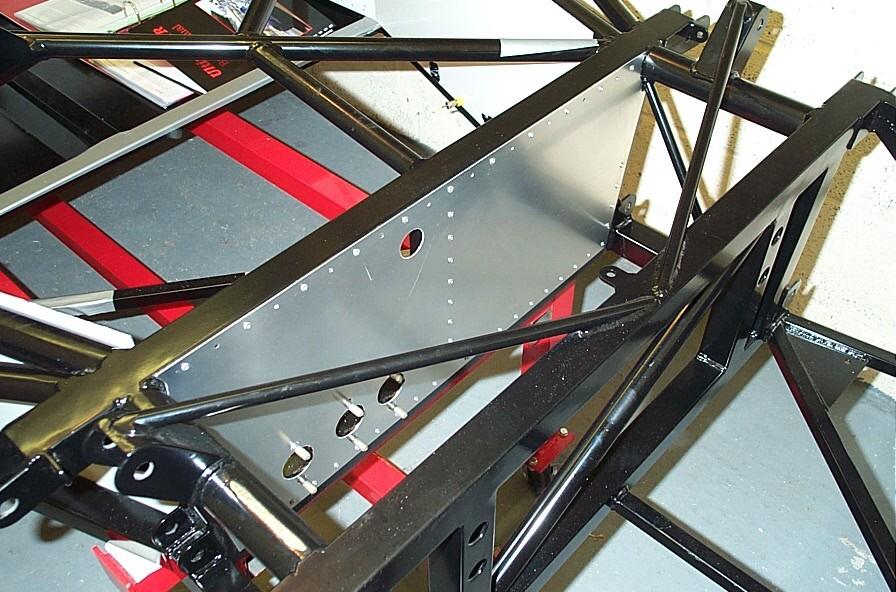
One down about 10 to go, until next time...
PS. For the people following the story, he's gone at last and my sister a last has her home back. So if you ever come across a man who goes by the name of Richard McCarthy (name and shame) and he's interested in renting you property, just think twice before you agree.