
So after some 8 weeks without the Ultima it was time to get stuck back into the
build. The first job that I wanted to do was the dash (read get it out of the
way as it wasn’t going to be easy). Why?
Well I had gone and made life difficult for myself as I had bought some new
switchgear that I wanted to use instead of the Ultima switches (self inflected
headaches to come then). The main problem being is that I couldn’t replicate the
exact functionality of the Ultima switches as the ones that I had were all push
button (on/off) only. Please refer to the
My Car section
for more info.
But I was not going to be defeated and decided to crack on with the dash layout
based upon all the new switchgear. This in itself is no easy task and my father
and I spent probably some 5 hours deliberating on the final layout. Although the
chassis made one of these decisions for us as the lower part of the dash CANNOT
be used as there is a major chassis rail running along the bottom behind the
dash (be careful as the loom is also attached to this rail). We also
found that the operating of the switches that are usually located on the right of the dash seemed a little awkward
although closer to the driver. With a few 'lets pretend to drive' poses we finally
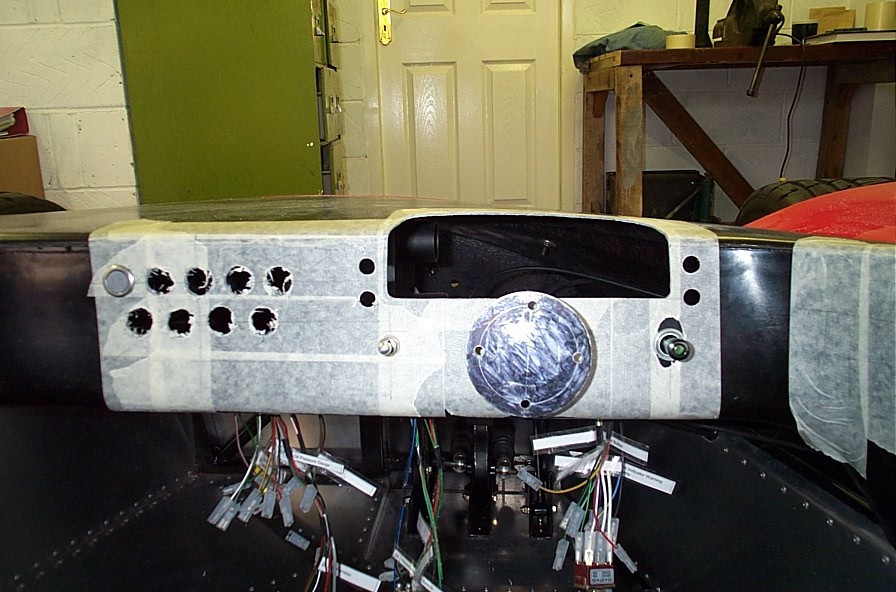
decided to place all the 9 push button switches in the centre of the dash. These
were placed in a 5/4 arrangement (see below pics), being careful to avoid the lower chassis rail
behind the dash. This left the warning lamps and the fuel change over switch and
indicator switch. The later 2 were easy and placed on the centre line of the
steering column in line with the edges of the cut-out for the Stack pod. The
warning lamps were placed either side of the Stack dash at the top were they can
be seen easily (always check positioning with the steering wheel held in place).
The cut-out for the Stack dash was supplied by Ultima on a paper
template and was easy enough to follow.
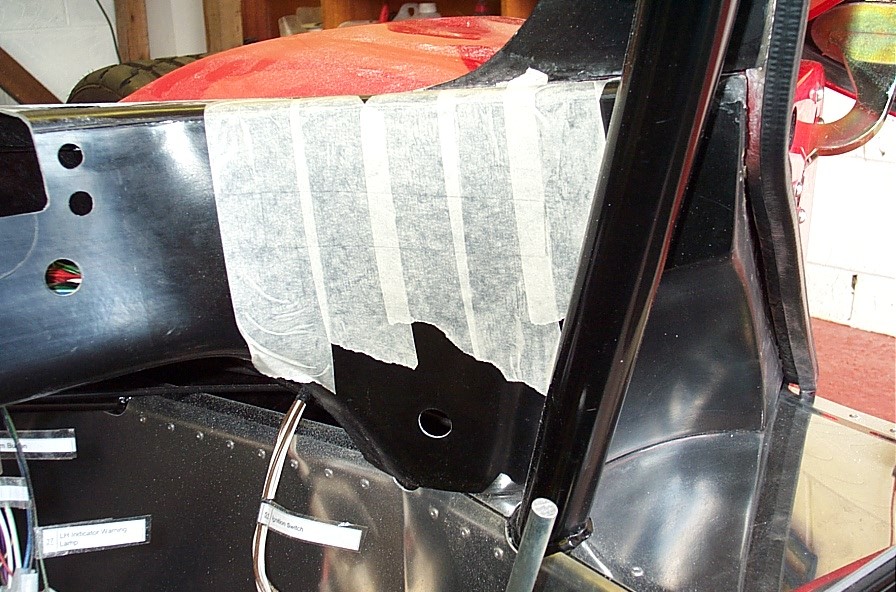
Holes that still need to be drilled include the starter button and the ignition
switch; also there are 4 switches with the Stack dash that will also need
locating. This is the next job, and then on to the wiring itself (ohh S***!!)…
P.S. The tool of choice for cutting holes in the dash is definitely the stepped drills, these work fantastically and don't tend to tear the GRP. Some 2" wide masking tape is also the order of the day as this helps with marking positions on the dashboard.
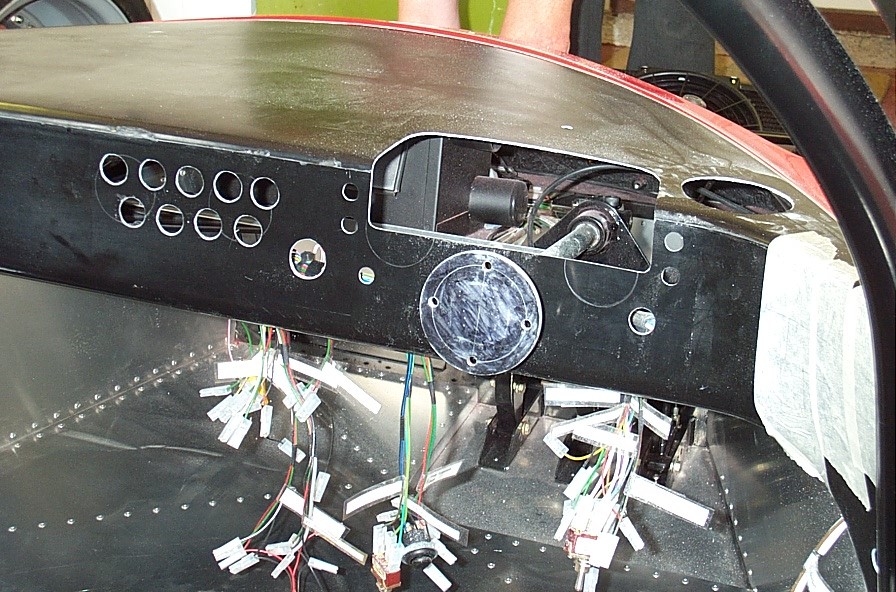
Lots of questions and not too much build...So the build continues but slowly, first up we managed to get some more holes in the dash (wohoo!). The main hole (pic) second to the left of the steering column is for the starter button, the second pic shows the positioning of the ignition switch (hope its not too close to the gear change!). The area above the ignition switch will be used for the Stack buttons (x4) as and when I get the dash that is on order. The final pic shows the positioning of the holes for the dash vents (note close proximity to the Stack pod). We we also have to drill a hole for the electric door mirror controller (ooops, almost forgot!).
Just a quick tip (again), if your cutting any holes above above 4mm in fibreglass then use the stepped drills (worth their weight in gold)...
Ok with no more holes to be drilled in the dash it was time to bolt something to the car. It was at this point things became a little awkward and we just started to generate a few questions for the boys back at Ultima:
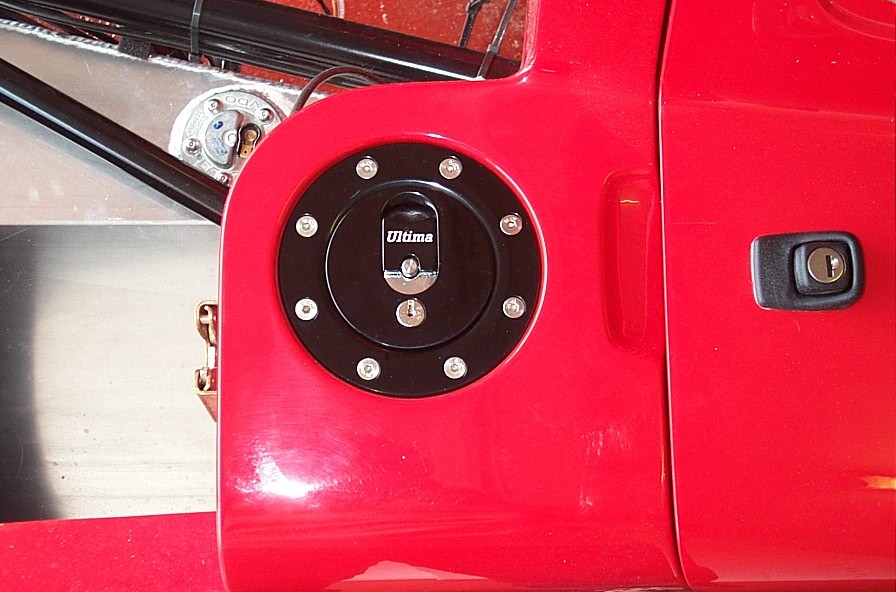
Thanks to Andy the following became apparent, there appeared to be a collar floating on the main thread of the wiper motor, this should be discarded (leaving two nuts, one small & one large washer, the later fitting up under the dash). The fuel filler funnel appears to have an overflow outlet that is sealed, this should be opened via a drill/knife and be orientated inwards towards the engine (later a small pipe needs to be connected and vented to atmosphere). The cork gasket supplied with the fillers should also be discarded and the fuel funnel sits inside the cut-out (not under as we had thought).
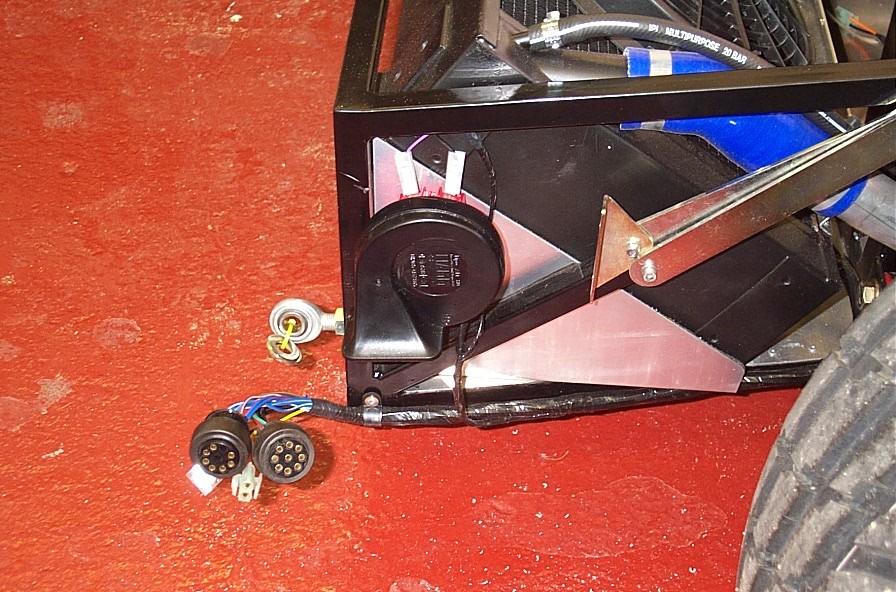
So we moved on to some other parts namely the battery clamp and the horn, surely these would be a piece of cake. Luckily they were and really there's little to tell as the pictures probably tell all you need to know. Although I needed to bend out the terminals on the horn as they appeared inaccessible regardless of the horn orientation.
Build continues on Saturday...
Sorry for the late update, been a little busy...
Over the last few weeks I have been immensely busy searching for a new home for the GTR (i.e. a double garage with a house on-suite). So have had very little time on the build but have managed to get a few odds and sods out of the way.
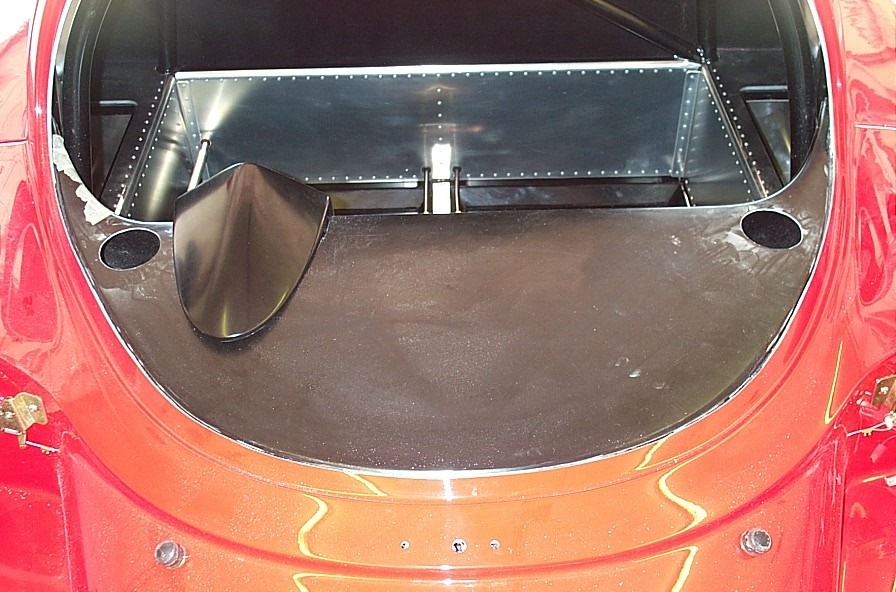
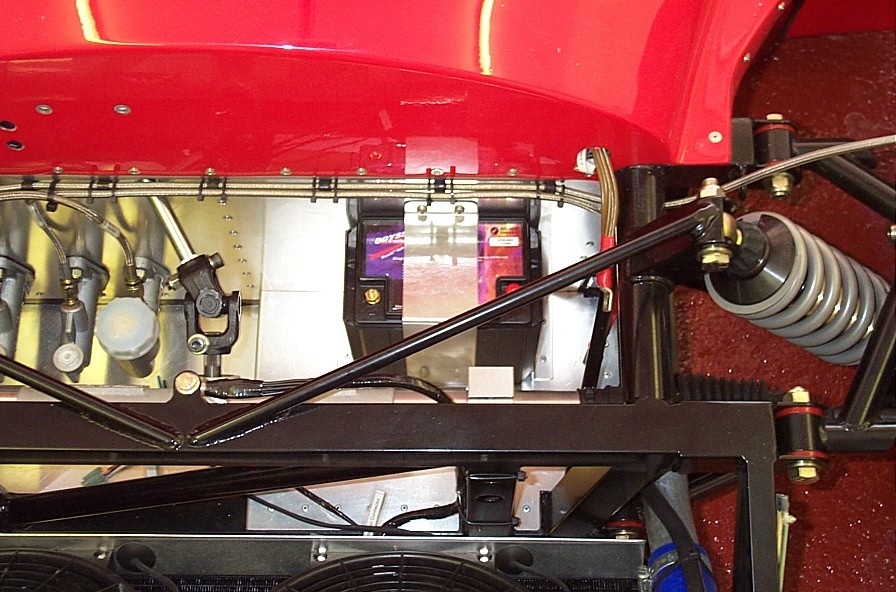
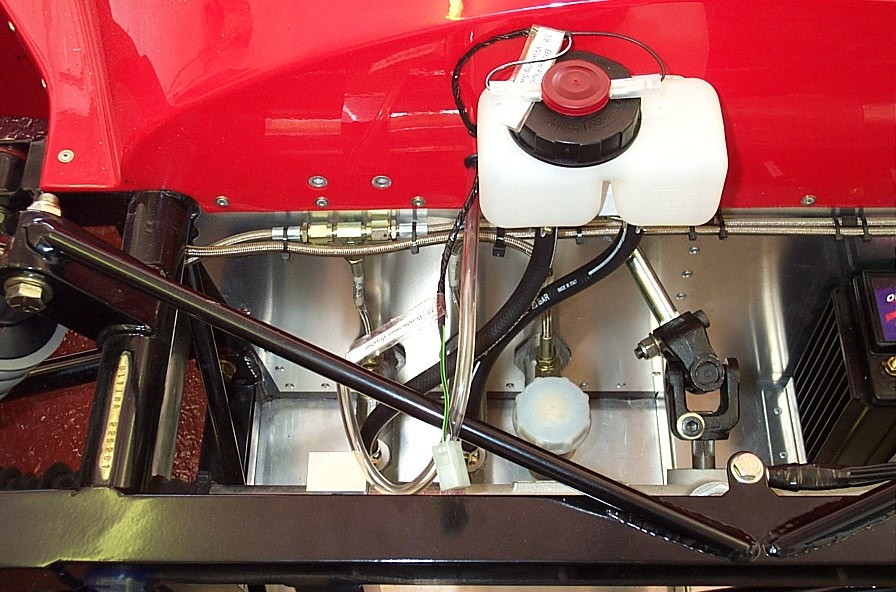
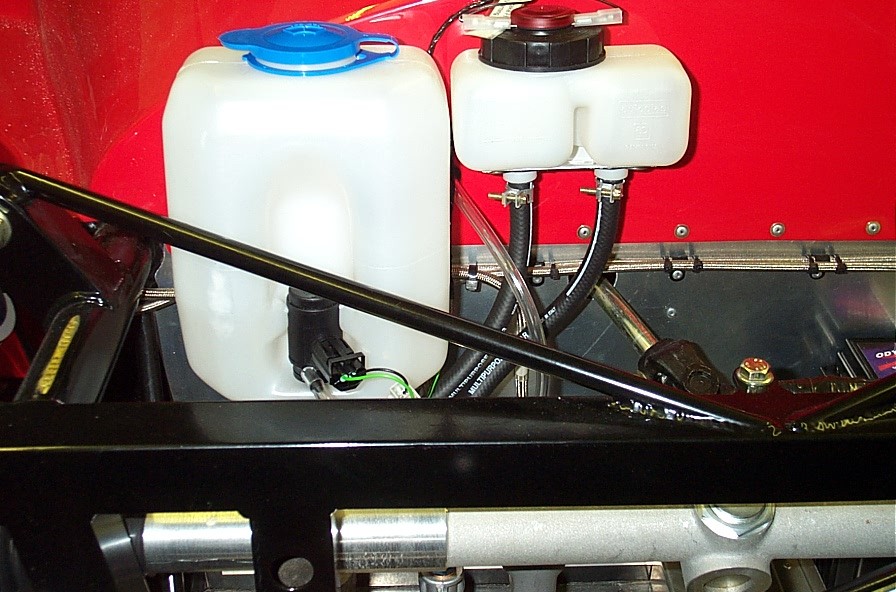
So first up was the fitment of the brake reservoir this was easy enough with the bracket provided. The holes were already in the body courtesy of Ultima and the bracket fitted perfectly. With the bracket and reservoir now in position it was time to find the appropriate wires up under the dash and feed them through, this was done easily with the addition of a grommet. With the wires connected up it was time to cut the rubber hose supplied in half and connect it up to the master cylinders. These seemed a little loose so were held gently in place with a couple of clips, see pics below. While in the area we also bolted the wiper motor/washer jet into place using the 15mm dimension shown in the manual. With this now in place the washer hose was also positioned utilising another grommet.

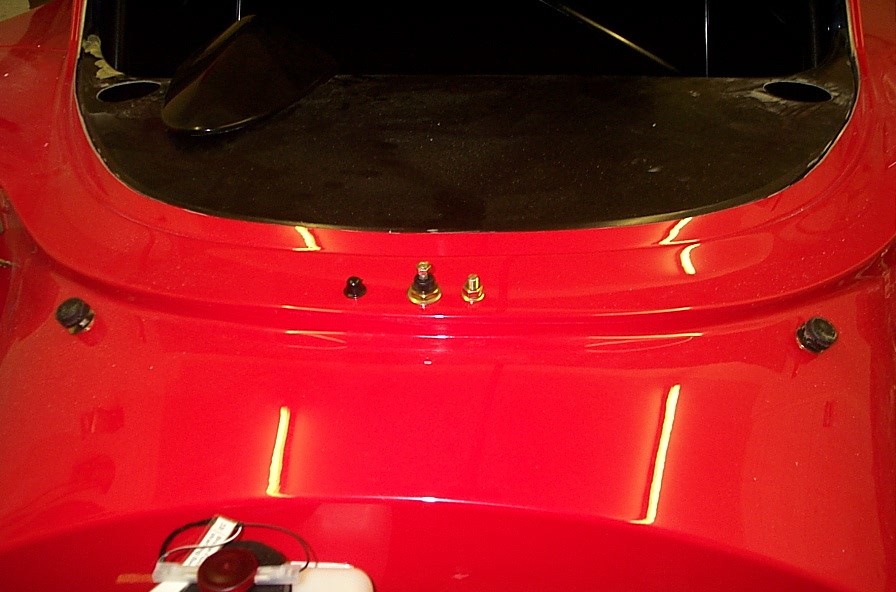
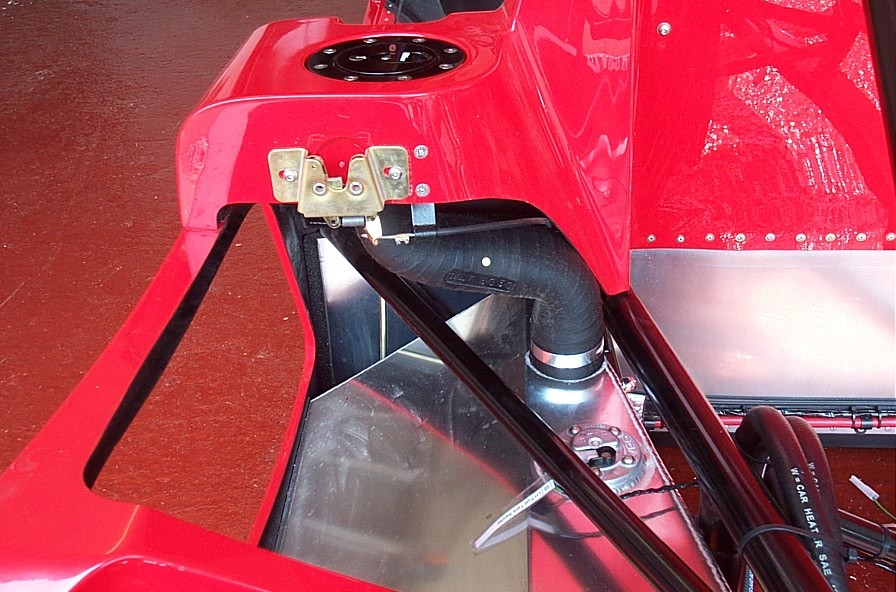
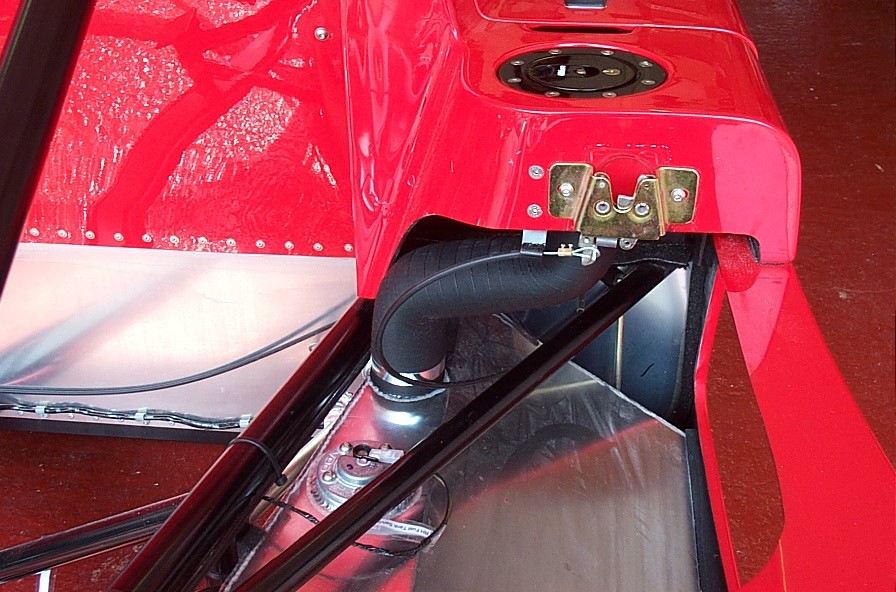
Having positioned and drilled the holes for the fuel fillers earlier it was now time to connect up the fuel hoses. This was easy enough although removing the aluminium film covering the holes in the fuel tank was a bit of a bind, as it breaks away easily and you don't want to get any in the tank!! We did notice that the lower pipe bend seemed a little tight though, although there was no room for alteration. While in the general vicinity the wires for the fuel tank senders were also connected up.
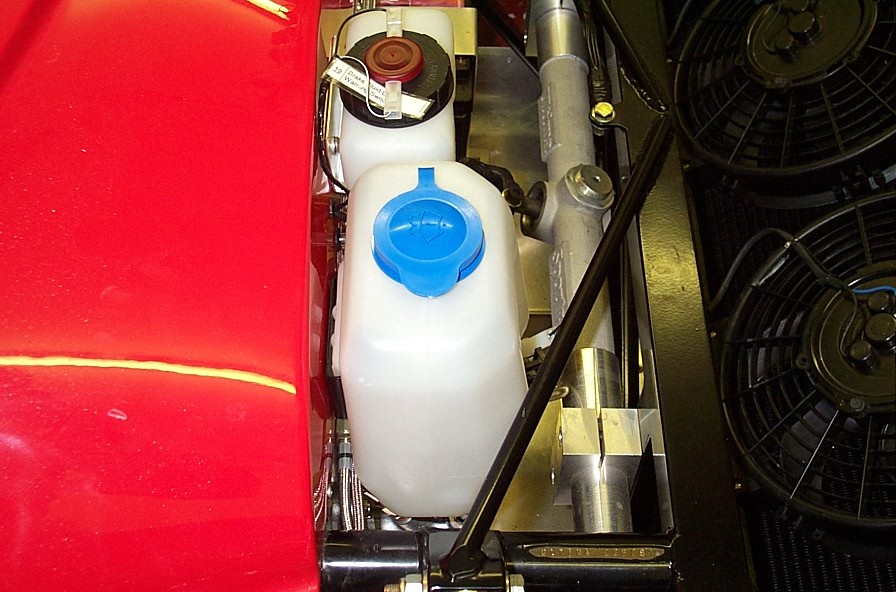
Next up was the fitment of the washer bottle itself using the bracket supplied. The holes from the body were transferred to the bracket, but these were not transferred to the centre of the bracket. The lower edge of the bracket was positioned so that it touched the upper edge of the washers used on the rivets holding the front of the cockpit in place. The wires were then connected up and the pipe also positioned.
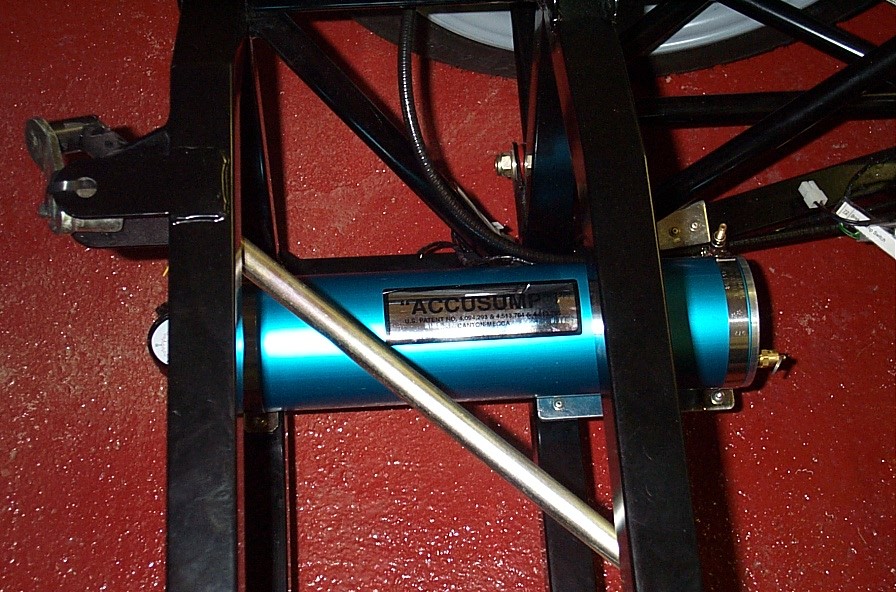
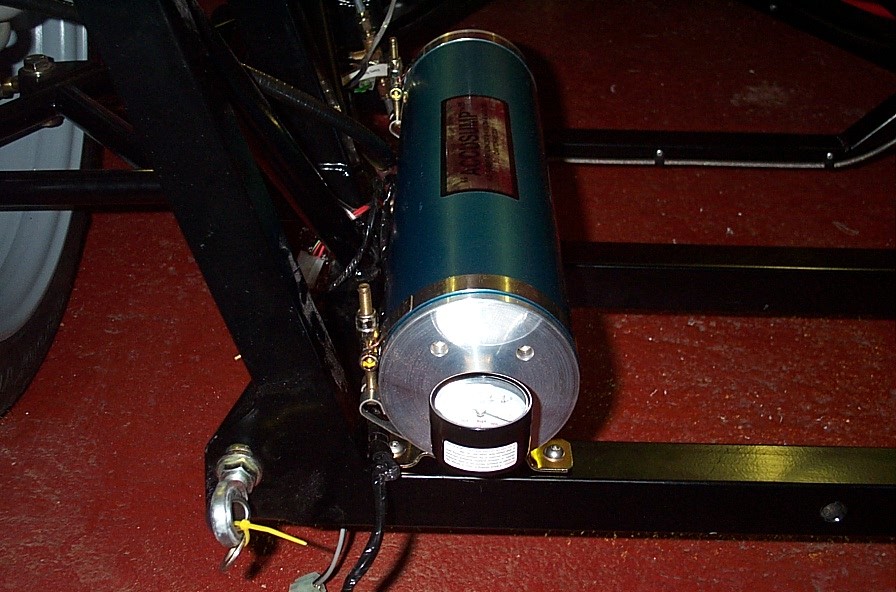
So it was time to bolt some more items to the chassis, now what do we have here. Ah a lovely Accusump System, so where does this go then? There are some pretty good pics of the fitment of the Accusump on the build manual CD Rom. The parts consist of the Accusump cylinder itself and a bracket and fixing clamps. The bracket is easily fitted but be very careful of any rivets that you use on the side of the bracket as drilling and riveting is almost impossible (just one would be enough). Once the bracket was in place the two clamps could be positioned the rearmost was positioned in the middle of the chassis rail, the other was positioned at the back of the bracket, see pics below.

There will be no build update next week as I'm off to Donnington this coming weekend for the FIA GT Championship, hope to bring you some piccies at least...
Well after a well lubricated weekend I can report that the FIA GT Championship is probably the best racing in the world. Having been to Castle Coombe the weekend before for the British GT I can definitely say the FIA was more enjoyable, just a shame there was no Ultima to cheer on, maybe next year. Unfortunately I have left my camera with a mate Chris and unfortunately he lives about 100+ miles away (doh!), so no pics for the mo, maybe later in the week. Thanks to Dave and Chris for being my drinking partners for the weekend, we had a damn fine time...
The good news is that my Stack dash has finally arrived, along with some other bits 'n bobs and if all goes according to plan my father and I will start the installation this weekend.